
vapor - dashlight connections
#1
 06-03-2008, 07:51 PM


I am currently trying to connect the vapordash lights to the stock wiring. So I have been at this dam thing for a few days now and I just carnt seem to get the coonections right - as of now everything works except the bike wont run! HAve people just used their old connections....??
please I am about to go bald - ripping my dam hair out!
please I am about to go bald - ripping my dam hair out!
#3
06-04-2008, 12:36 AM

The vapor you can run the wires directly off the battery. If you have trouble running the bike, try putting it back to stock and make sure nothing else is wrong there but I cant see how the Vapor could interfer with the bike running? As for the dash lights, I have the indicator housing for my vapor. The stock indicator bulbs plug straight in without any mods. The 4 stock dash lights I just removed the bulbs and dont use.
#4
06-04-2008, 12:50 AM
Cheers for the reply.
right, right, I've been trying to get too techinical and wire in the vapor directly to the OEM harness. I have everything working (lights,neutral,etc) however it seems that on the vapor harness they have doubled up on the negatives. This make it harder to connect to the stock OEM harness as kawi have got everything seperate... So did you keep the temp light aswell...?
right, right, I've been trying to get too techinical and wire in the vapor directly to the OEM harness. I have everything working (lights,neutral,etc) however it seems that on the vapor harness they have doubled up on the negatives. This make it harder to connect to the stock OEM harness as kawi have got everything seperate... So did you keep the temp light aswell...?
#6
06-04-2008, 03:27 AM
I'm thinking about getting the vapor too. Did ya'll buy the klx300 one?
#7
06-04-2008, 09:05 AM
#8
06-04-2008, 01:33 PM
Will check out my setup and post tomorrow... From memory I tapped into the stock tacho cable for that. The original temp light left as is, plugged straight into one of the indicator housing spots. More tomorrow...
#9
06-04-2008, 02:57 PM
Still working on it, the three ring connectors on the back of the standard tach have to go together but I am unsure ofwhich way....
I nocticed onsuncap forum that he has accomplished what I tried but never did get right..... JUST NEED TO RIDE!
so Ial off again tohave another go at it!
I nocticed onsuncap forum that he has accomplished what I tried but never did get right..... JUST NEED TO RIDE!
so Ial off again tohave another go at it!
#10
06-04-2008, 11:21 PM
Ok I took some pics, I'll do a proper write up at some stage but for now:
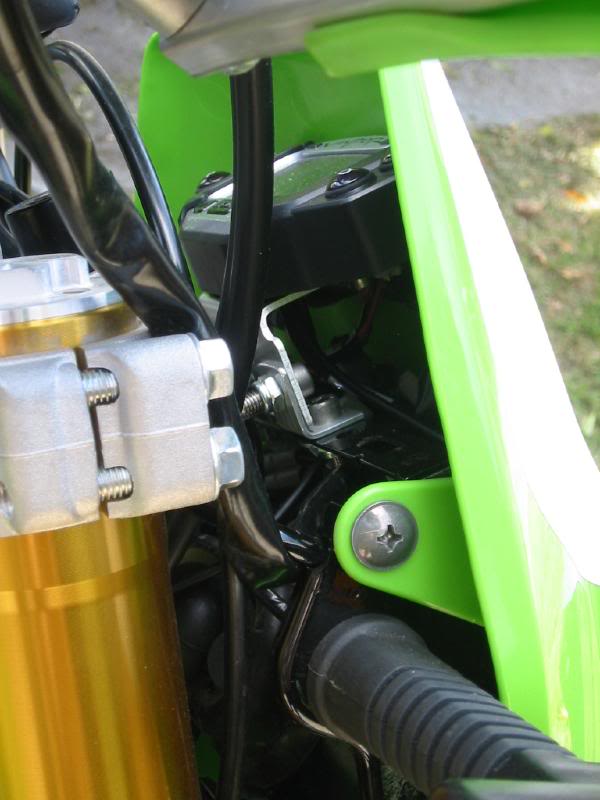
1) The vapor mounted. I built some right angle brackets from aluminium strip and bolted that to the bracket that came with the indicator housing:
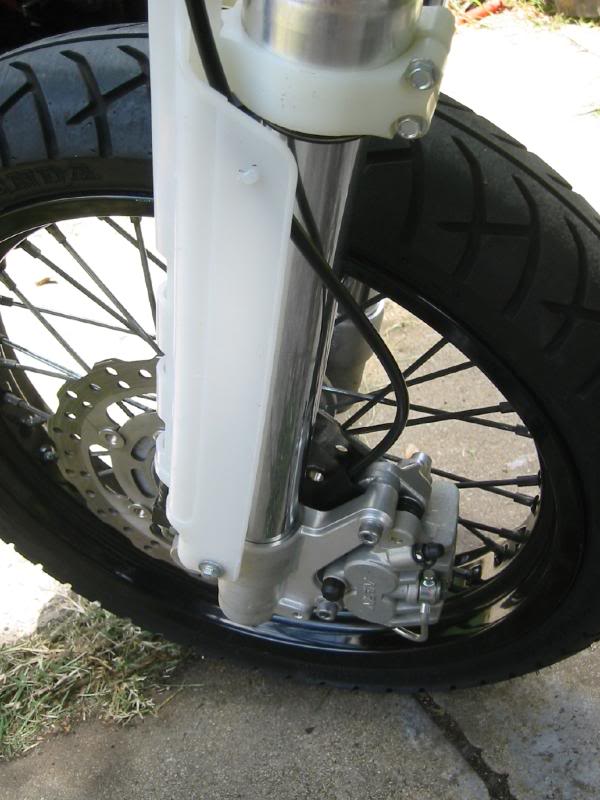
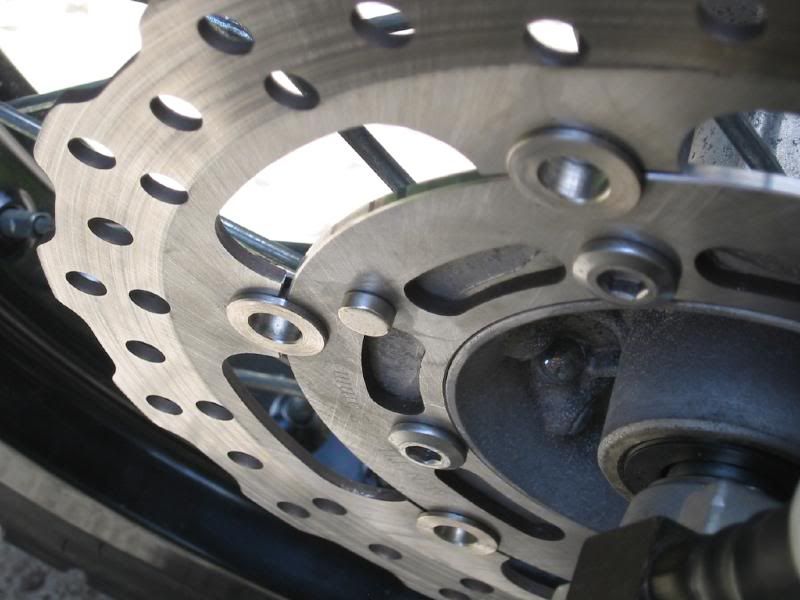
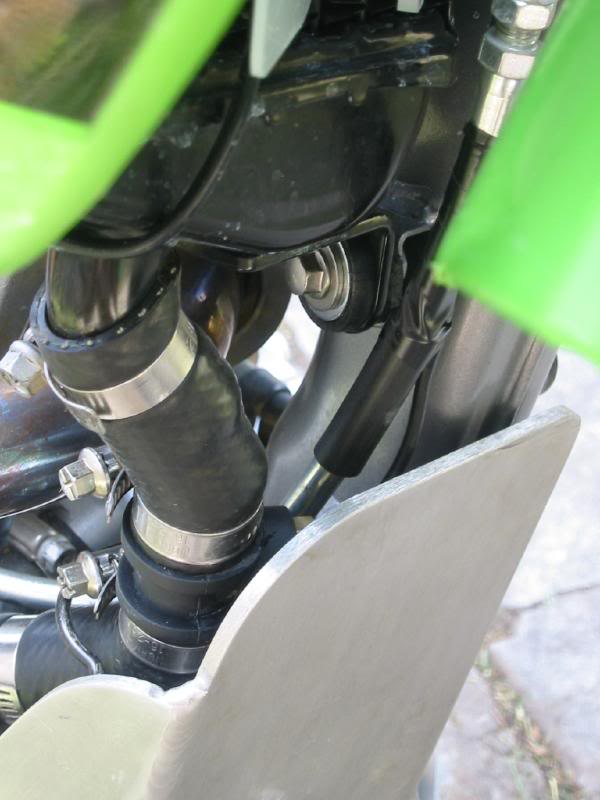
2) Speed sensor. Run along the front brake line cable. I drilled the caliper and used the screw supplied. I also drilled 2 holes in the fork guard and mounted a cable tie on an angle to help keep the cable in place. The original speedo drive is left in place, cable removed and plugged with the plug supplied in the kit. Also glue the magnet onto the disc:
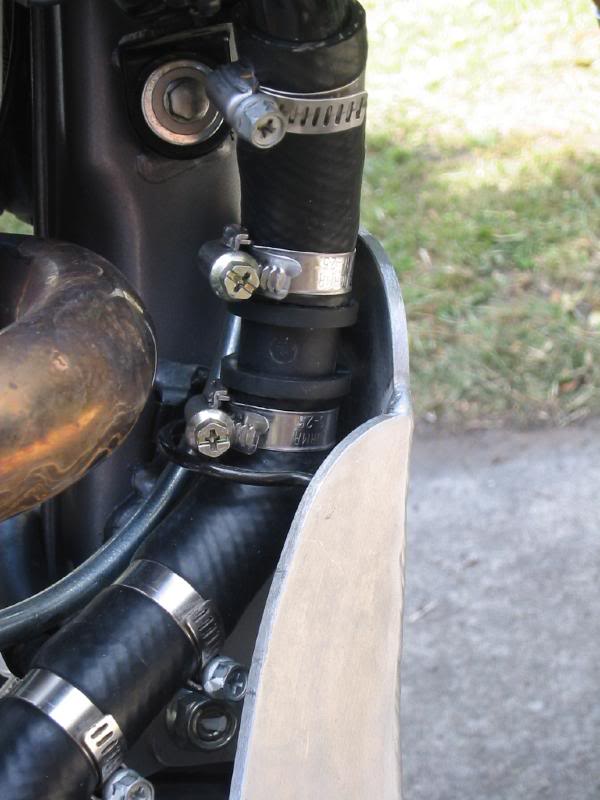
3)Temperature sensor. I actually tapped the cold side of the radiator by mistake. Its a PITA to install the sensor here too as there are a lot of bends in the tubing so you have to be careful where you cut the hose. The advantage of mounting this side is I could run the cable up the clutch cable for a neat and safe finish:
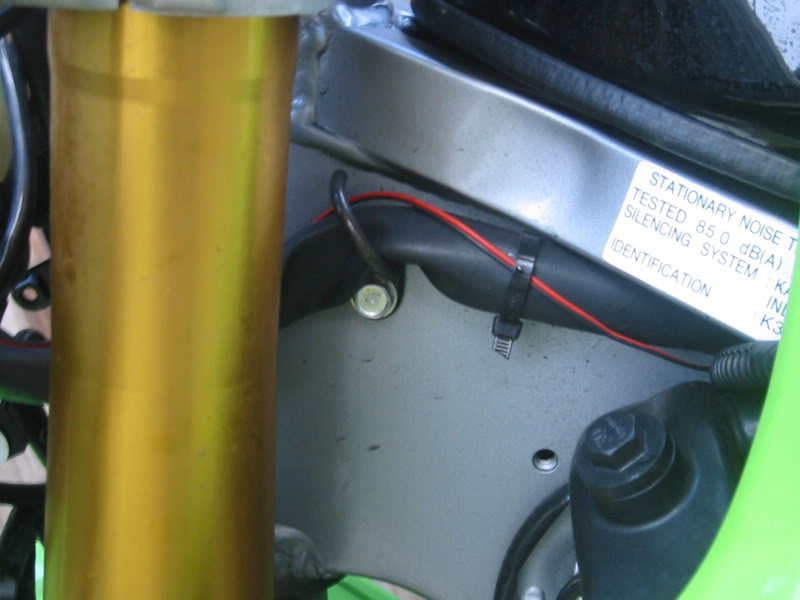
4) Power Cable. Run down the other cable line to the battery. Im sure you could tap another set of wires somewhere (one of the original backlight wires?). The issue with running it directly off the battery is the Vapor stays backlit for a long time after the bike is shut off. So I found a wire to tap into that is only on when the ignition is on (tail light cable from memory). This means that the vapor runs off its own batteries when the ignition is off but at least the backlight doesnt stay on forever:
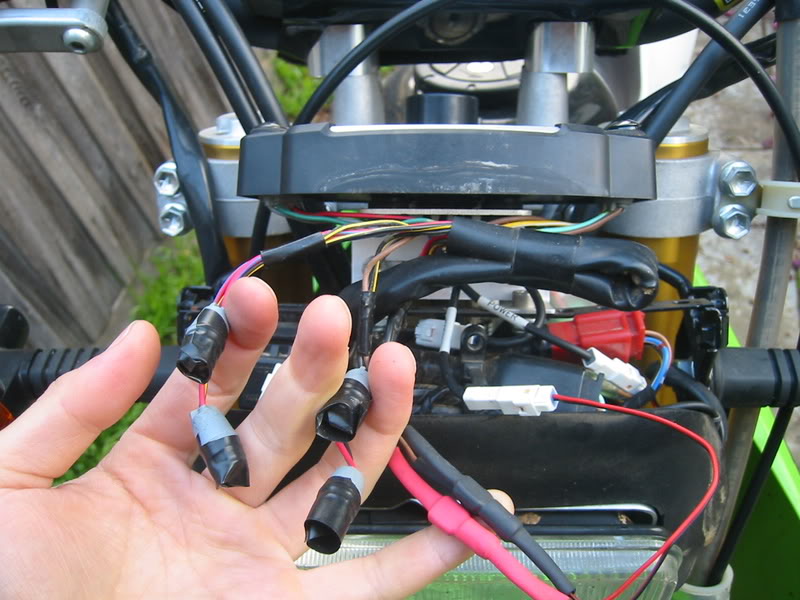
5) Dash Wiring. Ok, there are 5 things: 1, power. 2, tacho. 3, water temp. 4, idiot lights. 5, original backlights.
1, power, pretty straightforward, run back to the battery as per 4).
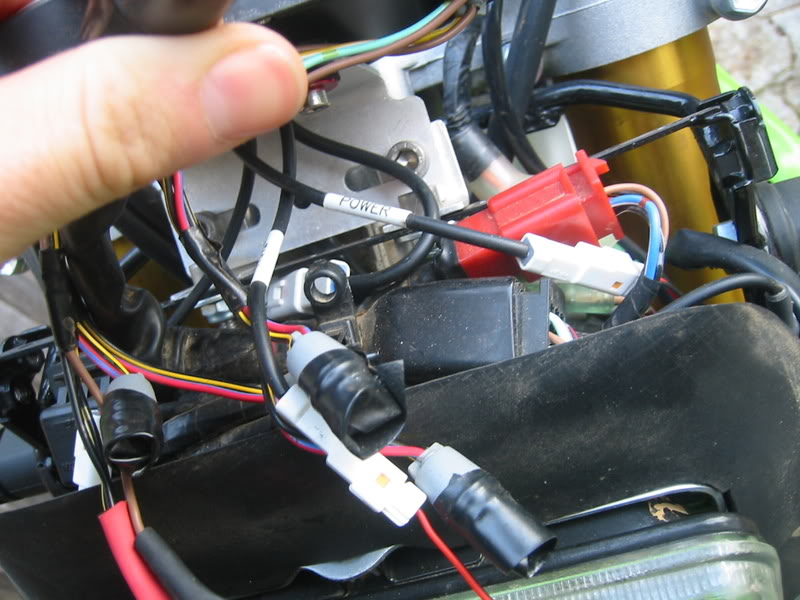
2, tacho. I went against the instructions and used the original tacho cables. Ignore the brown cable. Join the original black tach cable to the red Vapor wire. Join the original black/yellow tach cable to the black vapor wire:
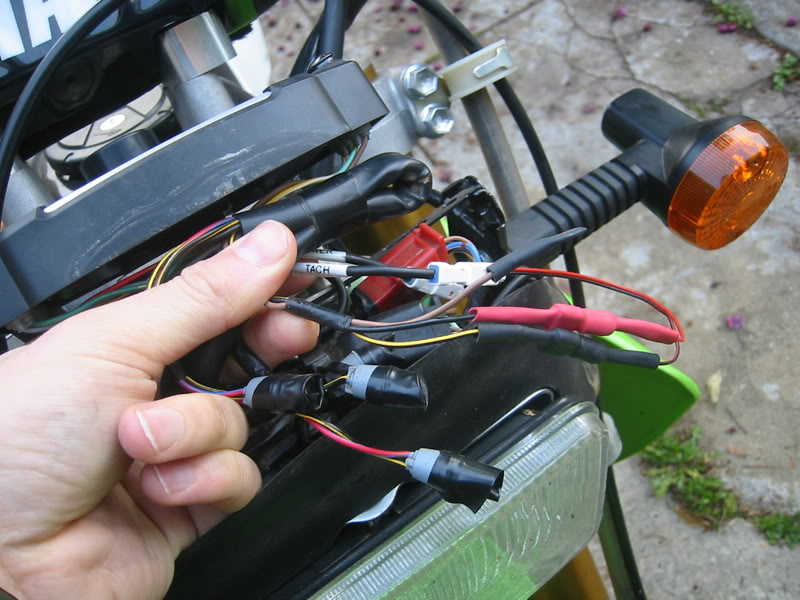
3, water temp, pretty straight forward, run back to the temp sensor as per 3).
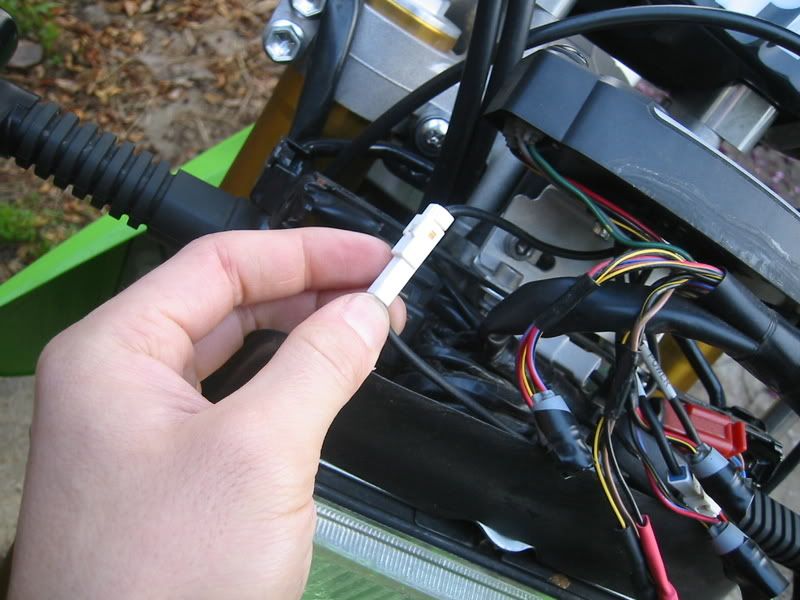
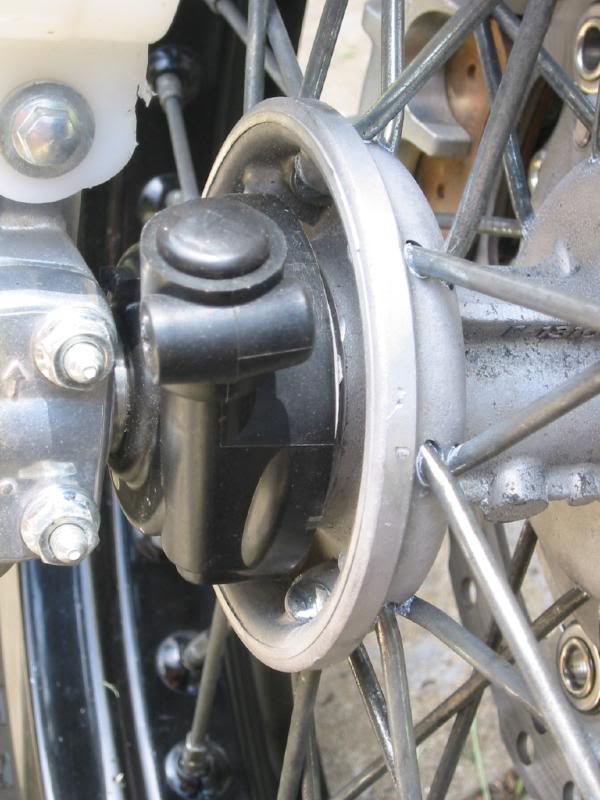
4, idiot lights. Pull them out of the original dash and they slot straight into the new housing as is! Sweet!
5, Original backlights. Not used. I pulled the bulbs out and taped over the ends. This pic you can also see the idiot lights plugged into the plastic indicator housing:
Thats it! I'll get around to labelling the photos oneday to make it clearer.
1) The vapor mounted. I built some right angle brackets from aluminium strip and bolted that to the bracket that came with the indicator housing:
2) Speed sensor. Run along the front brake line cable. I drilled the caliper and used the screw supplied. I also drilled 2 holes in the fork guard and mounted a cable tie on an angle to help keep the cable in place. The original speedo drive is left in place, cable removed and plugged with the plug supplied in the kit. Also glue the magnet onto the disc:
3)Temperature sensor. I actually tapped the cold side of the radiator by mistake. Its a PITA to install the sensor here too as there are a lot of bends in the tubing so you have to be careful where you cut the hose. The advantage of mounting this side is I could run the cable up the clutch cable for a neat and safe finish:
4) Power Cable. Run down the other cable line to the battery. Im sure you could tap another set of wires somewhere (one of the original backlight wires?). The issue with running it directly off the battery is the Vapor stays backlit for a long time after the bike is shut off. So I found a wire to tap into that is only on when the ignition is on (tail light cable from memory). This means that the vapor runs off its own batteries when the ignition is off but at least the backlight doesnt stay on forever:
5) Dash Wiring. Ok, there are 5 things: 1, power. 2, tacho. 3, water temp. 4, idiot lights. 5, original backlights.
1, power, pretty straightforward, run back to the battery as per 4).
2, tacho. I went against the instructions and used the original tacho cables. Ignore the brown cable. Join the original black tach cable to the red Vapor wire. Join the original black/yellow tach cable to the black vapor wire:
3, water temp, pretty straight forward, run back to the temp sensor as per 3).
4, idiot lights. Pull them out of the original dash and they slot straight into the new housing as is! Sweet!
5, Original backlights. Not used. I pulled the bulbs out and taped over the ends. This pic you can also see the idiot lights plugged into the plastic indicator housing:
Thats it! I'll get around to labelling the photos oneday to make it clearer.