
Adventures 351.0
#41
 12-22-2011, 04:18 PM

Join Date: Oct 2010
Location: SW Idaho
Posts: 4,507
Look what arrived Monday from Wichita

I picked up the needle jet holder for the KLX300. Something the Ranger had done. It has a couple extra holes up higher that may benefit fuel dispersion. Crappy phone pic.
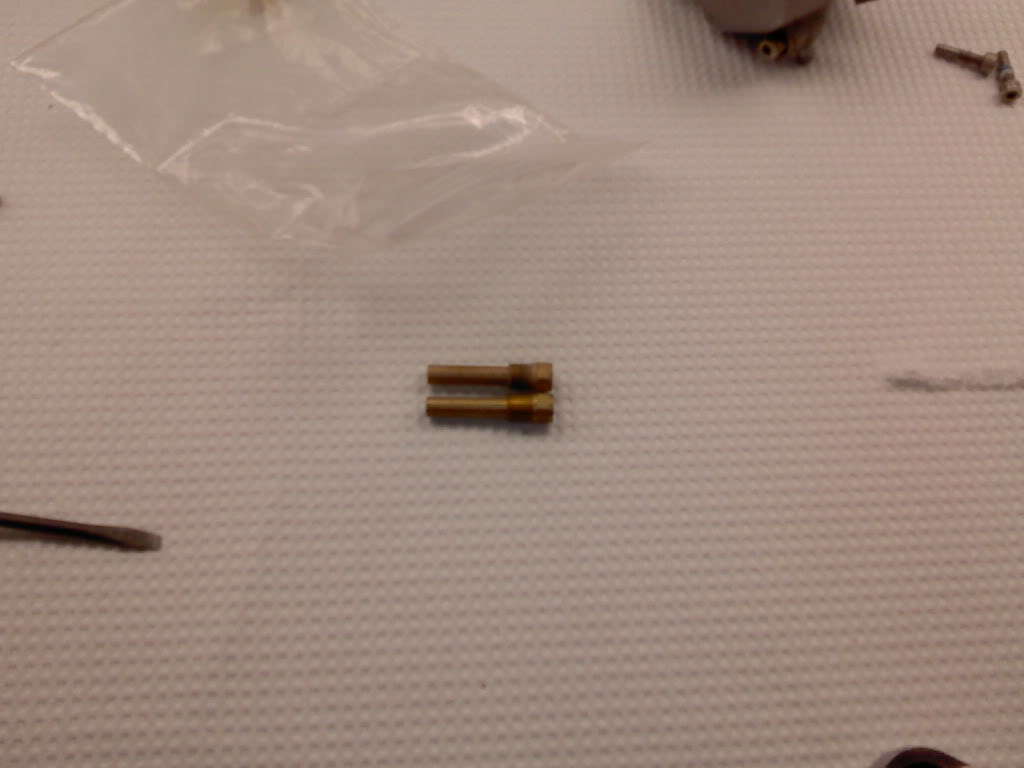
Rejetted the carb per Bill. Plus 1 on the pilot (#35 to #38 Kaw jet) and +2 on the main (124 to 128 dynojet). Also moved the clip from 2nd to 3rd position from the top. It looked pretty clean so just did a little carb cleaner and compressed air through the passages, bowl, etc.

Clutch plate kit is still on back order.
Removed 2 links from the chain for the 45 tooth rear sprocket. The 13, 14 & 15 counter sprockets will all work with this setup.
/IDRIDR
I picked up the needle jet holder for the KLX300. Something the Ranger had done. It has a couple extra holes up higher that may benefit fuel dispersion. Crappy phone pic.
Rejetted the carb per Bill. Plus 1 on the pilot (#35 to #38 Kaw jet) and +2 on the main (124 to 128 dynojet). Also moved the clip from 2nd to 3rd position from the top. It looked pretty clean so just did a little carb cleaner and compressed air through the passages, bowl, etc.
Clutch plate kit is still on back order.
Removed 2 links from the chain for the 45 tooth rear sprocket. The 13, 14 & 15 counter sprockets will all work with this setup.
/IDRIDR
Last edited by IDRIDR; 01-08-2012 at 05:46 PM.

#43
01-08-2012, 03:58 PM
Join Date: Oct 2010
Location: SW Idaho
Posts: 4,507
The Trail Tech X2 headlight is a tight fit. I cleaned up the wires a bit for room, removed the clutch switch, and added a fuse for the grip heaters. Also loomed the new wires going to the rear of the bike (+/- unfused wires directly from the Trail Tech Vapor to the battery posts, and a couple other wires for a special project).

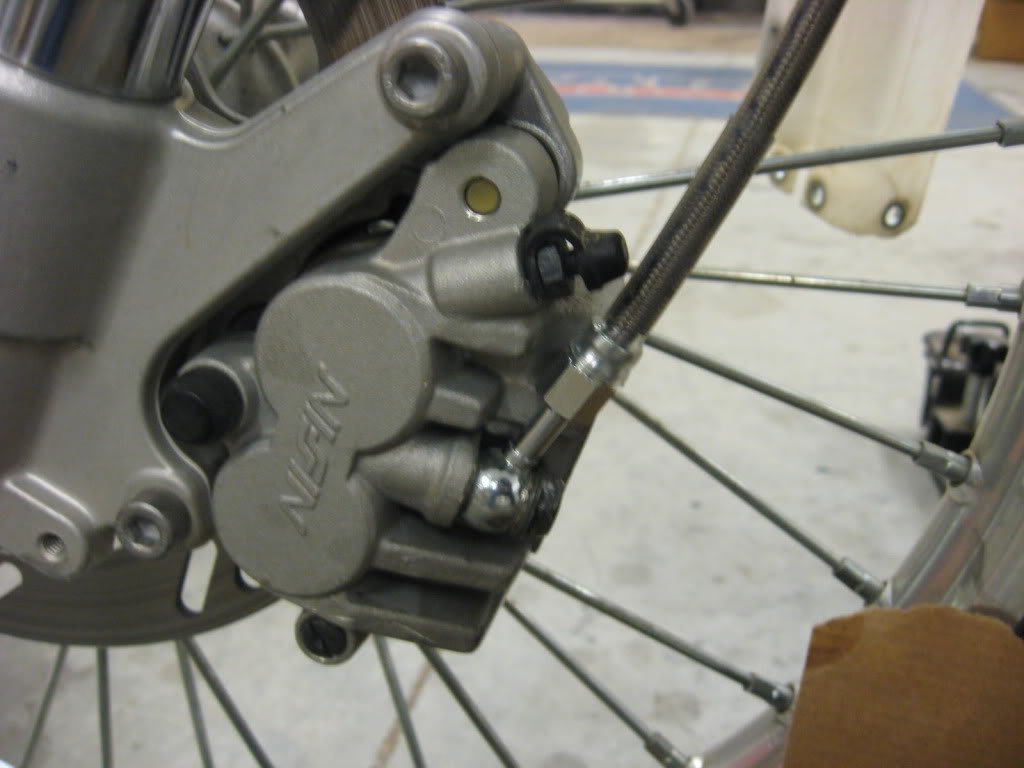
Installed a SS brake line purchased from Mr. Blue. Bled the brakes. Feels better, but I think there is still a bubble in the line.
The right grip is a little ugly. Have a new one in the shop that will go on in spring, after the cold weather has passed in case I mess up the heater in the process.

After all the talk recently about float height, I decided it best to check. Good thing.

When the petcock was opened, fuel ran out the bottom of the bowl drain and vent ports. The float needle was not sealing. I tore it apart and sprayed it down good. It took a couple attempts and I was getting frustrated and worried that I'd bunged something up. So, read some posts on this site, followed instructions, cleaned whatever was the problem out, and wallah! Within 1mm above the float bowl mating surface.

Installed a SS brake line purchased from Mr. Blue. Bled the brakes. Feels better, but I think there is still a bubble in the line.
The right grip is a little ugly. Have a new one in the shop that will go on in spring, after the cold weather has passed in case I mess up the heater in the process.
After all the talk recently about float height, I decided it best to check. Good thing.
When the petcock was opened, fuel ran out the bottom of the bowl drain and vent ports. The float needle was not sealing. I tore it apart and sprayed it down good. It took a couple attempts and I was getting frustrated and worried that I'd bunged something up. So, read some posts on this site, followed instructions, cleaned whatever was the problem out, and wallah! Within 1mm above the float bowl mating surface.
Last edited by IDRIDR; 01-08-2012 at 04:12 PM.
#44
01-08-2012, 04:27 PM
Join Date: Oct 2010
Location: SW Idaho
Posts: 4,507
Got an early start yesterday. It looked like we had everything ready to put this sucker together and maybe even fire her up. But alas, it didn't turn out that way. Murphy made his obligatory calling, as you will see.
Here's my emissions system plug from last year:

Lots of carbon collected in the unit.

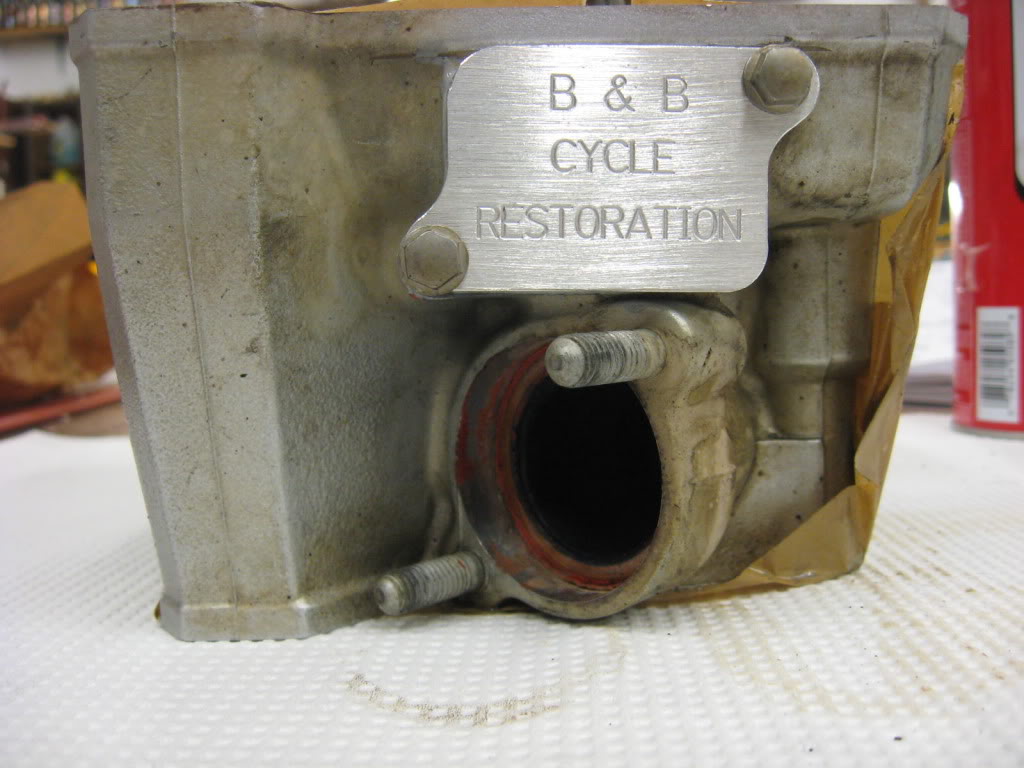
With a new B & B Cycle Restoration block off plate.
Set the piston in from the top. This is probably NOT the best approach. Keep reading.
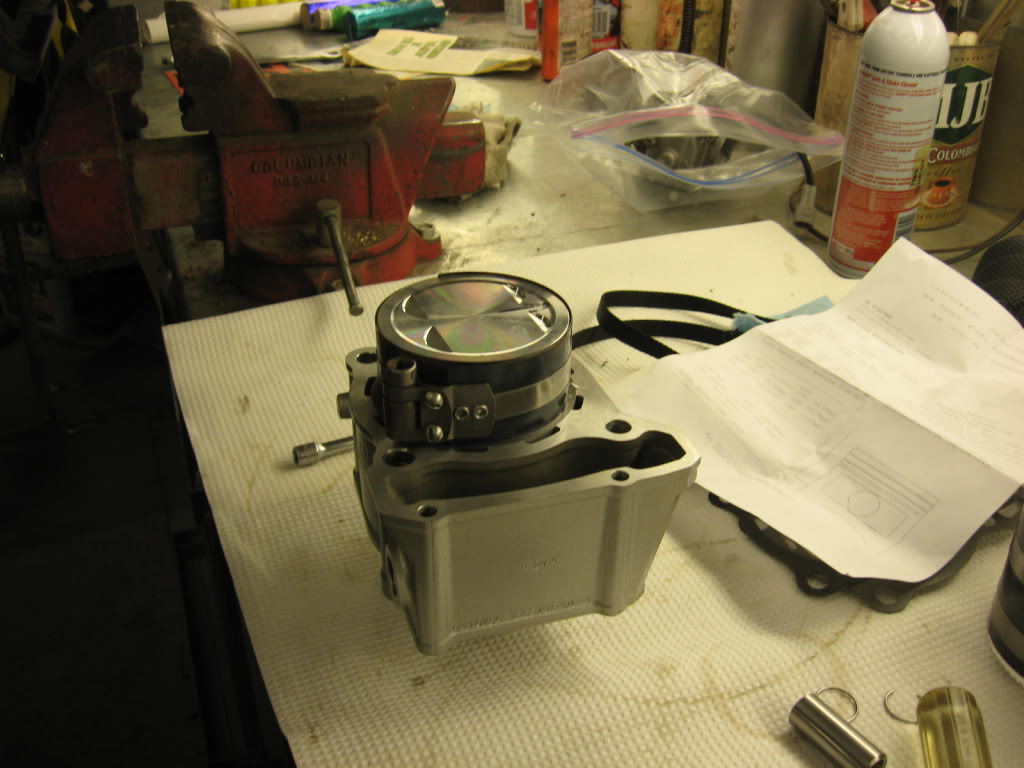
Careful there!

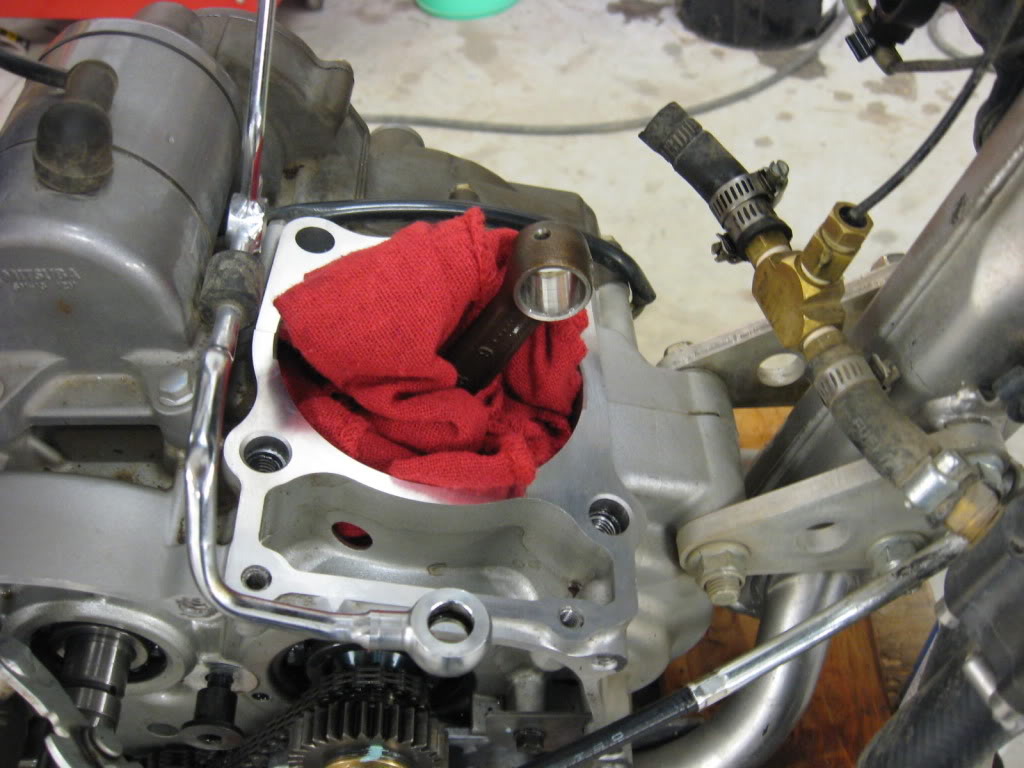
If I didn't mention this earlier, the little hose with brass fittings and wire on the right is the Thermo Bob bypass line where I installed the Trail Tech Vapor Computer temperature sensing unit. With this approach, the Vapor Computer is reading the coolant exiting the engine and always passing through this bypass line whether the thermostat is open or closed. The sensor is a little close to the exhaust pipe. When I'm stopped and the bike is hot, I think there is a little influence from the exhaust pipe heat on the sensor. I'll try to pull it a little further from the exhaust.
Please, when you do this, remember to install the gasket before locking the wrist pin in place. No need to ask why this recommendation is made .
.
From above, we first put the piston in the cylinder and then attached the piston to the connecting rod. Then, after the missing gasket (doh!), we pulled the cylinder off the piston because doing without the gasket just didn't seem too brilliant. Installing the new piston FIRST on the connecting rod, and then using a smaller ring compressor and placing the cylinder over the piston was so much easier than the first approach. Lesson learned, and shared with you.

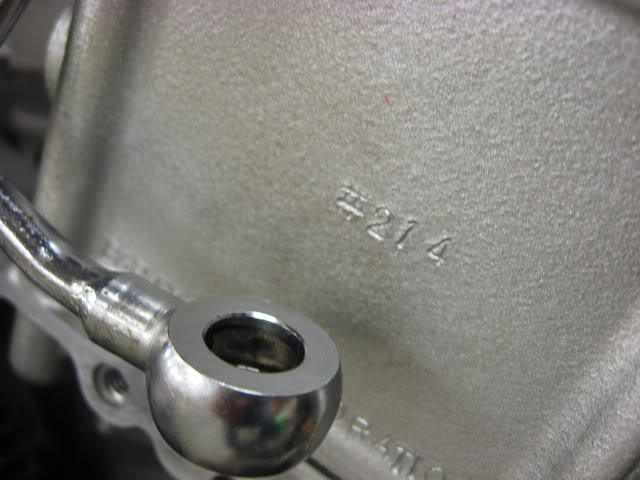
#214. Kind of makes me wonder how many of these are still out there thumping away.
And more advice: when new parts arrive, always give them a careful inspection. This mistake shut down progress on the upper end. New one will go into Monday's mail. Got one unhappy hombre here.


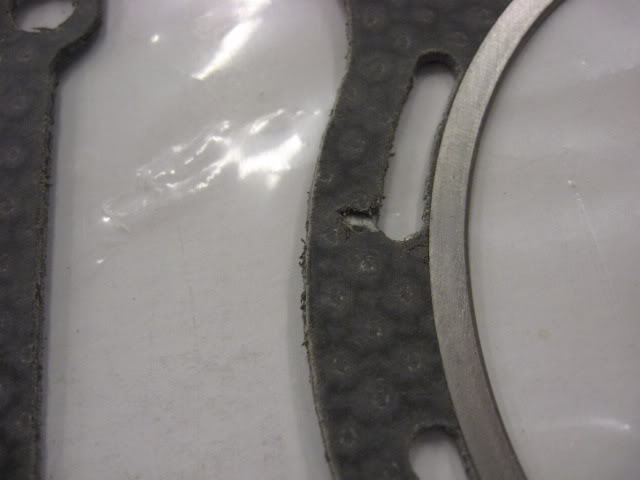
Would you have used this gasket?
Here's my emissions system plug from last year:
Lots of carbon collected in the unit.
With a new B & B Cycle Restoration block off plate.
Set the piston in from the top. This is probably NOT the best approach. Keep reading.
Careful there!
If I didn't mention this earlier, the little hose with brass fittings and wire on the right is the Thermo Bob bypass line where I installed the Trail Tech Vapor Computer temperature sensing unit. With this approach, the Vapor Computer is reading the coolant exiting the engine and always passing through this bypass line whether the thermostat is open or closed. The sensor is a little close to the exhaust pipe. When I'm stopped and the bike is hot, I think there is a little influence from the exhaust pipe heat on the sensor. I'll try to pull it a little further from the exhaust.
Please, when you do this, remember to install the gasket before locking the wrist pin in place. No need to ask why this recommendation is made
. From above, we first put the piston in the cylinder and then attached the piston to the connecting rod. Then, after the missing gasket (doh!), we pulled the cylinder off the piston because doing without the gasket just didn't seem too brilliant. Installing the new piston FIRST on the connecting rod, and then using a smaller ring compressor and placing the cylinder over the piston was so much easier than the first approach. Lesson learned, and shared with you.
#214. Kind of makes me wonder how many of these are still out there thumping away.
And more advice: when new parts arrive, always give them a careful inspection. This mistake shut down progress on the upper end. New one will go into Monday's mail. Got one unhappy hombre here.
Would you have used this gasket?
Last edited by IDRIDR; 01-08-2012 at 10:01 PM.
#45
01-08-2012, 04:40 PM
Join Date: Oct 2010
Location: SW Idaho
Posts: 4,507
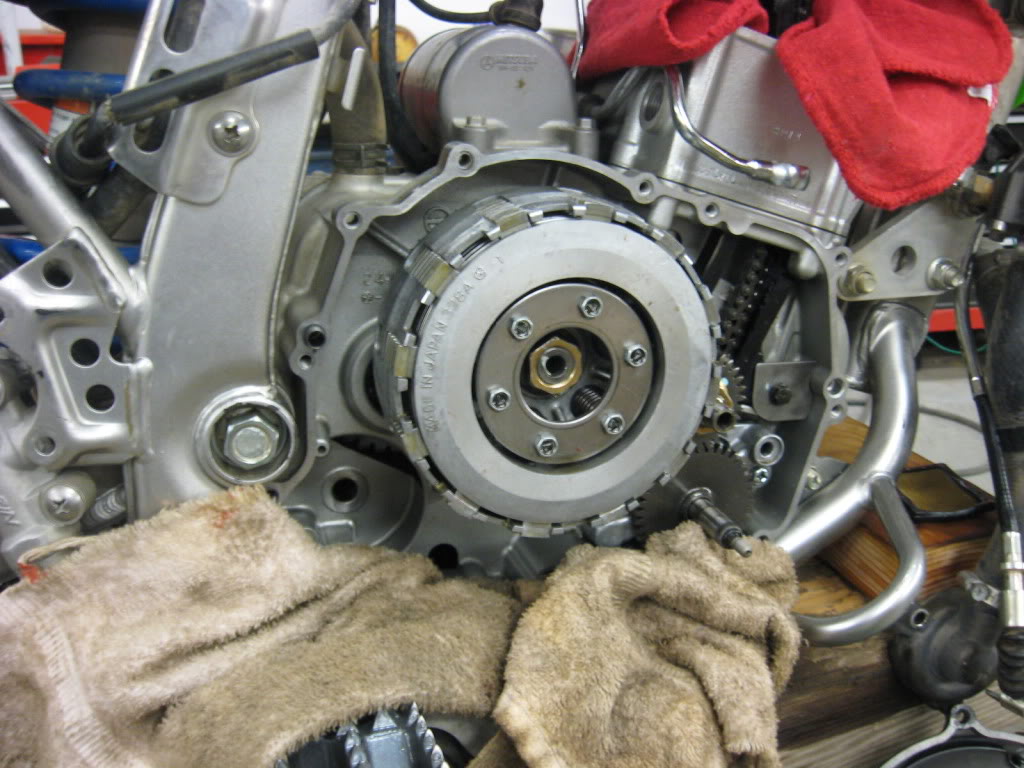
New EBC clutch friction plates and metal disks (Dirt Racer KIT) and Barnett springs.
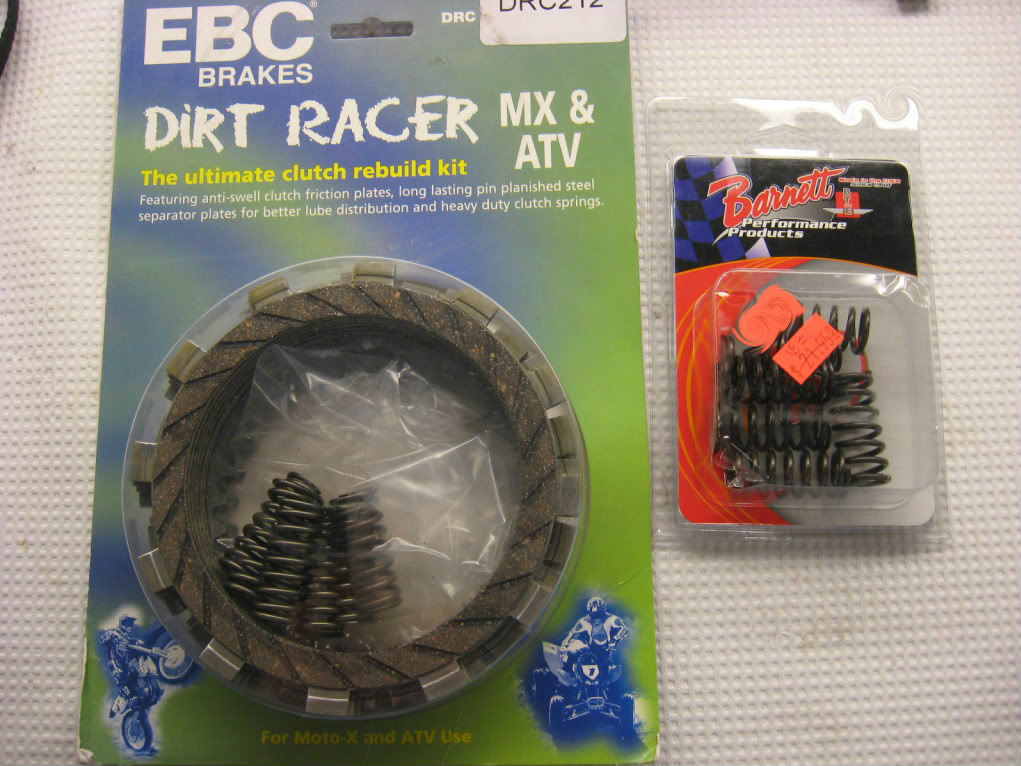
Soaked them in oil first, and assembled.
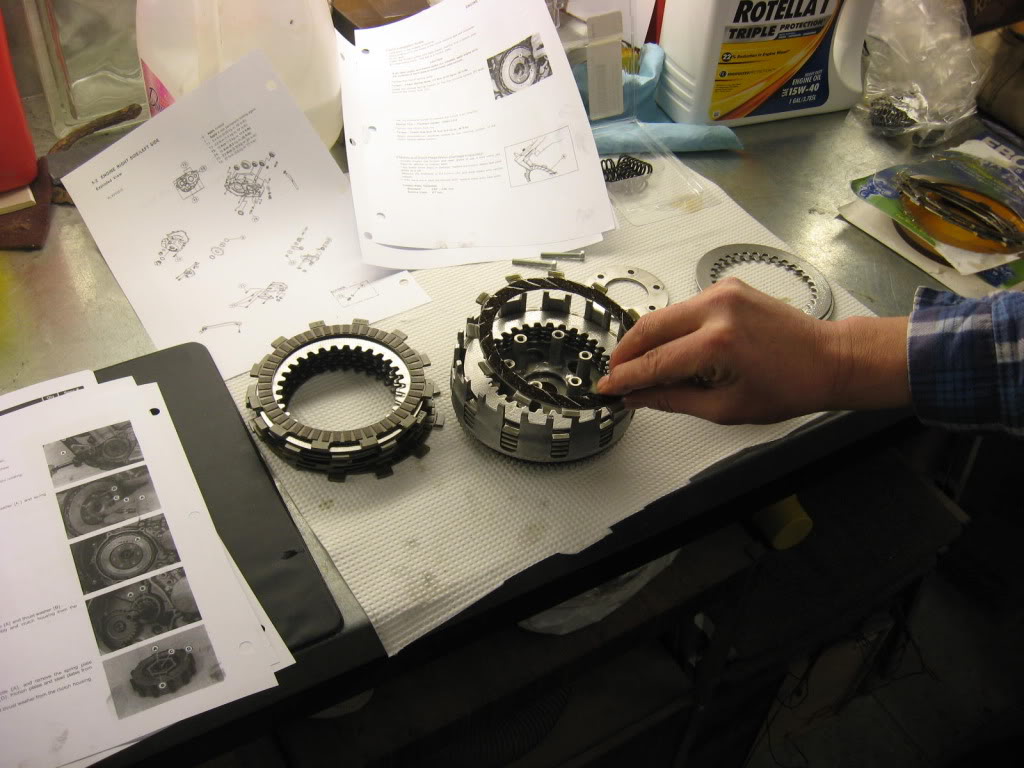
Assembled incorrectly. After looking at my prior pics and others posted here, I see that the outside clutch plate should be offset from the rest and setting in the basket notch. This isn't described in the manual or exploded parts sheets. So this needs to be fixed. Score another for that Murphy bastid.
Soaked them in oil first, and assembled.
Assembled incorrectly. After looking at my prior pics and others posted here, I see that the outside clutch plate should be offset from the rest and setting in the basket notch. This isn't described in the manual or exploded parts sheets. So this needs to be fixed. Score another for that Murphy bastid.
Last edited by IDRIDR; 01-08-2012 at 09:44 PM.
#46
01-08-2012, 05:25 PM
Join Date: Oct 2010
Location: SW Idaho
Posts: 4,507
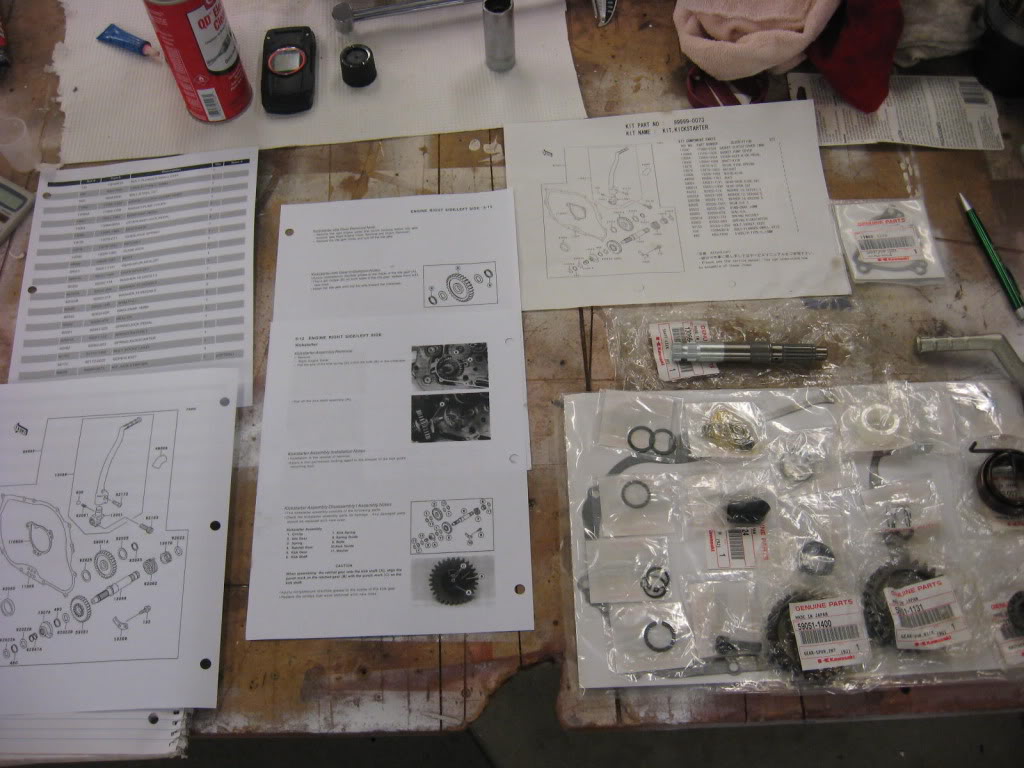
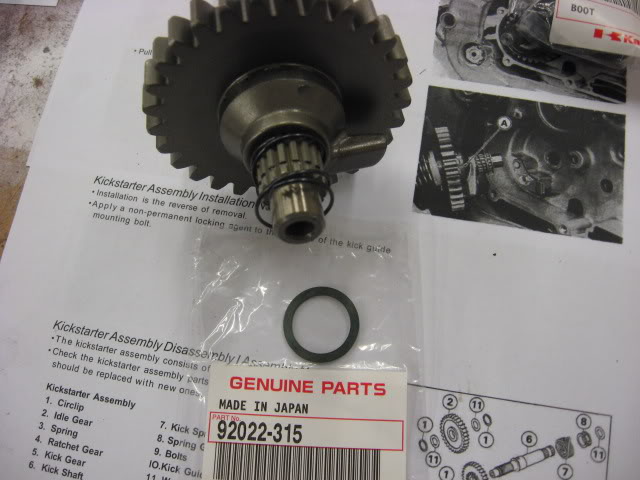
Installing the Kickstarter. Here are the main posts I followed. There are others, but these are the best two IMO.
Finger Mullet: https://www.kawasakiforums.com/forum...l-w-pics-9044/
LaurenOE: https://www.kawasakiforums.com/forum...ite-how-19497/ See her link to: KLX250s Kickstarter
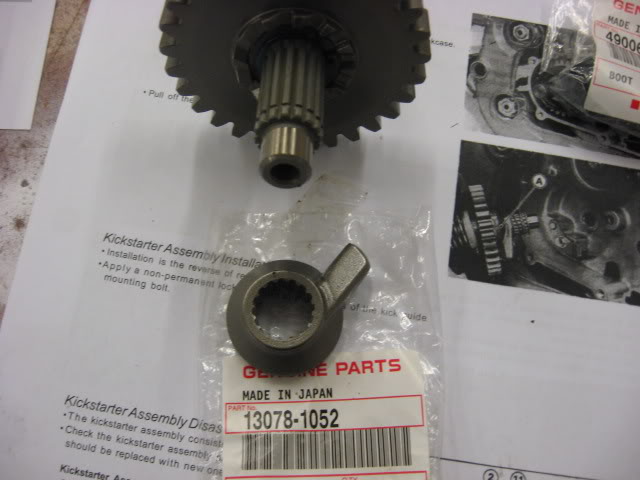
Every single part in my kit was bagged and labeled. FM an Lauren weren't so lucky.
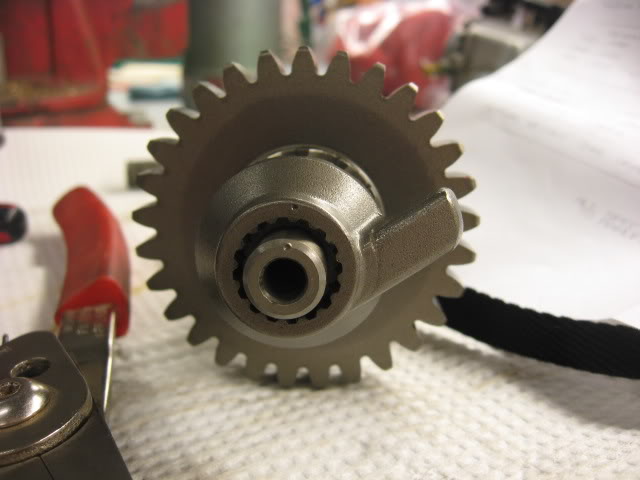
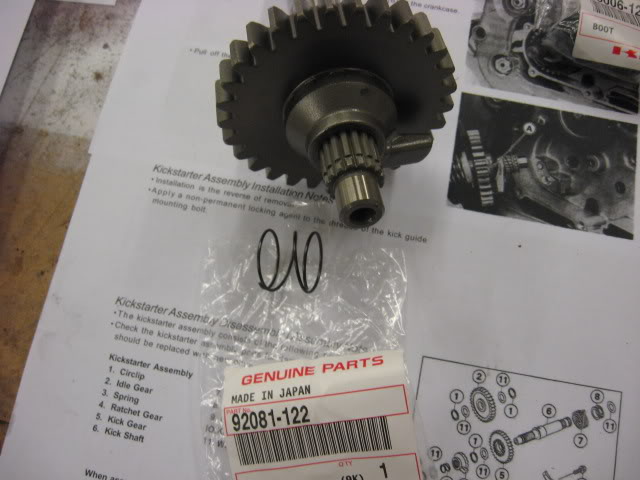
A pile of pics...
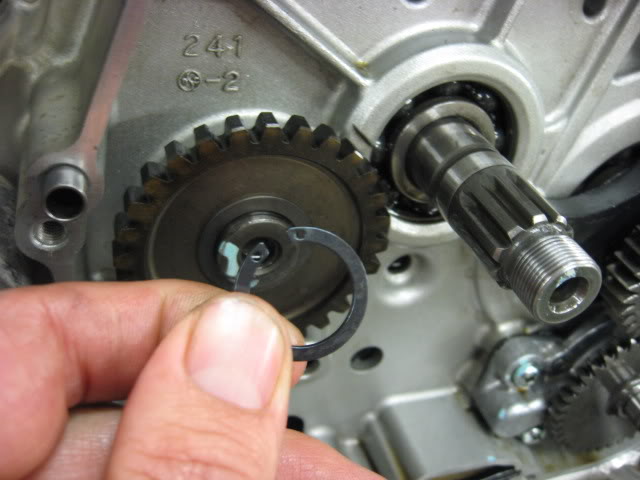
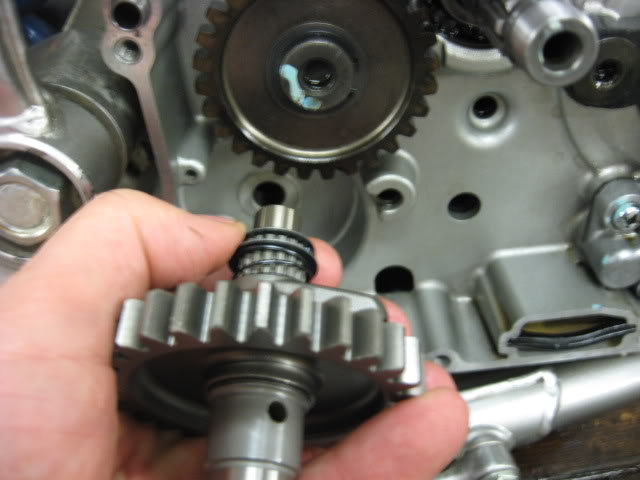
remove a circlip
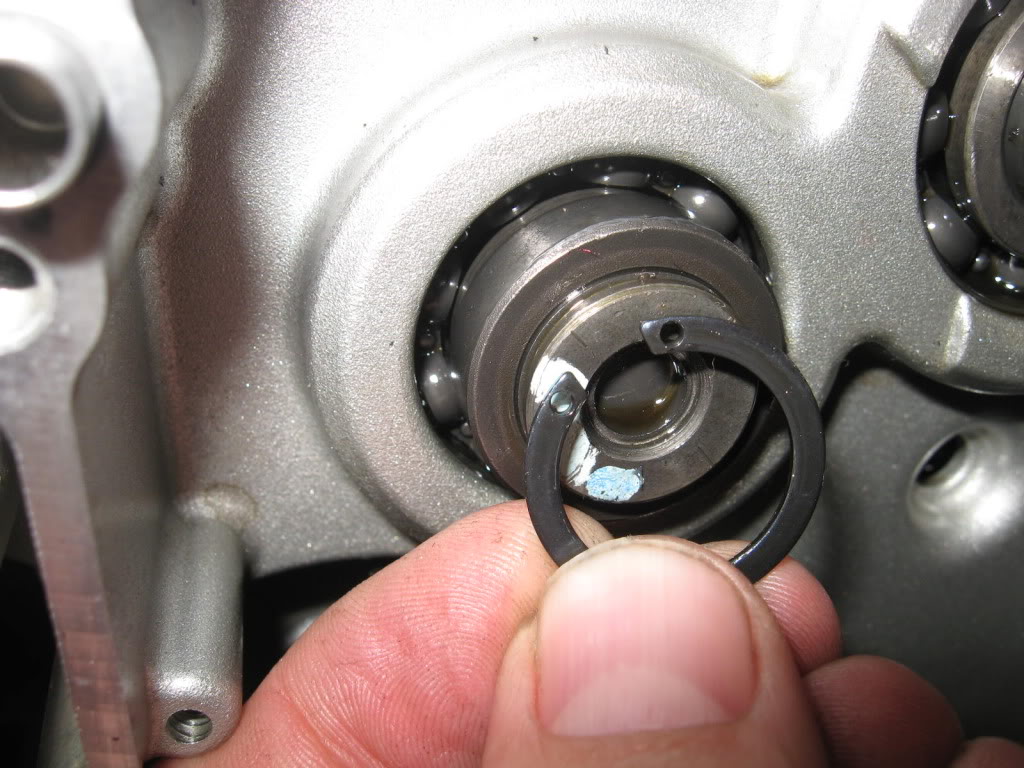
and this goes

use one of these

on either side of this


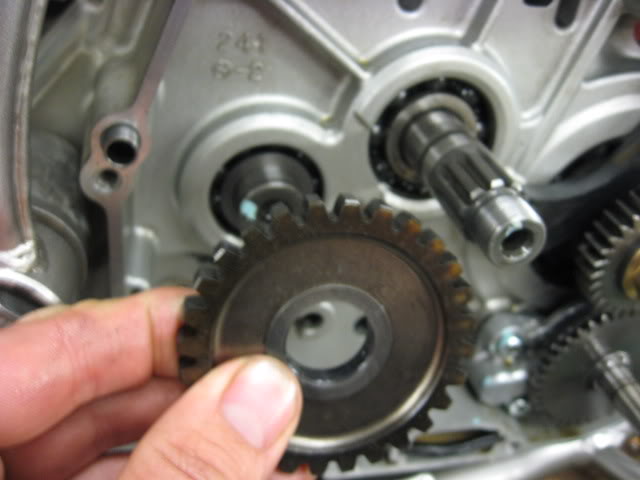

And secure with circlip
Finger Mullet put this on first (I didn't follow directions very well)

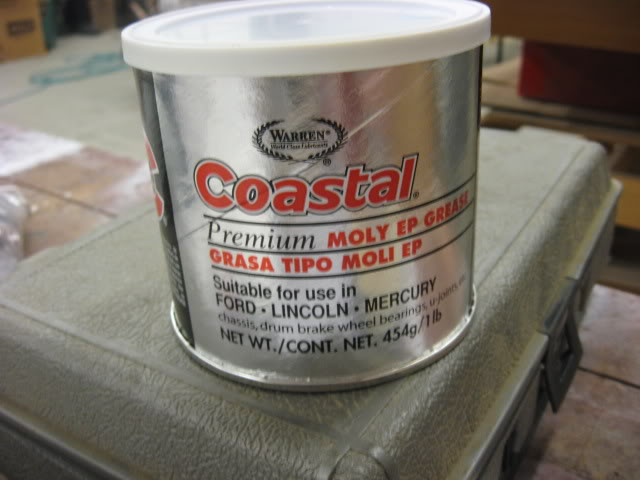
Used a dab of this here and there
Finger Mullet: https://www.kawasakiforums.com/forum...l-w-pics-9044/
LaurenOE: https://www.kawasakiforums.com/forum...ite-how-19497/ See her link to: KLX250s Kickstarter
Every single part in my kit was bagged and labeled. FM an Lauren weren't so lucky.
A pile of pics...
remove a circlip
and this goes
use one of these
on either side of this
And secure with circlip
Finger Mullet put this on first (I didn't follow directions very well)
Used a dab of this here and there
Last edited by IDRIDR; 01-08-2012 at 05:27 PM.
#47
01-08-2012, 05:26 PM
Join Date: Oct 2010
Location: SW Idaho
Posts: 4,507
Continued


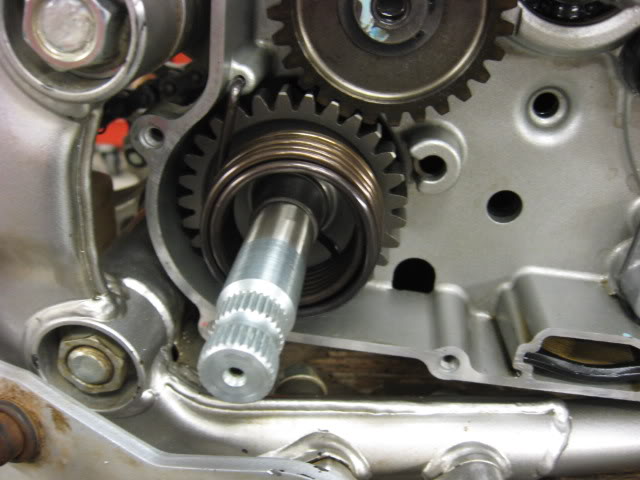
!!!CRITICAL!!! Be sure the dimples line up on these parts as shown:


Turn the mechanism clockwise all the way. Insert the spring in the shaft, and turn the spring clockwise about 3/4 turn until it can be inserted into the engine case to lock it.

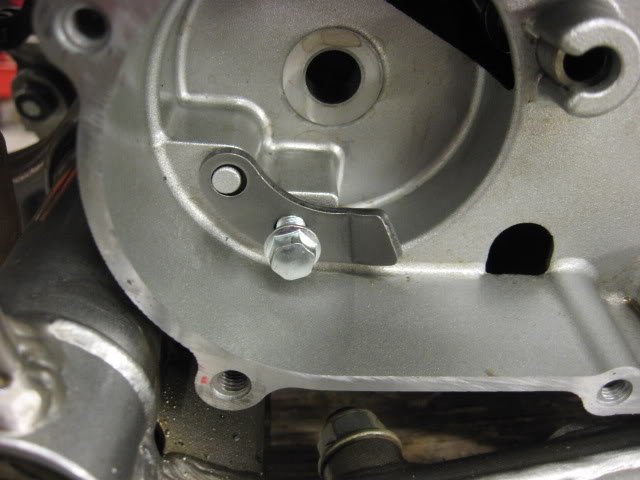
Knock out the kick start plug from the right side cover and put the cover on to check fit.
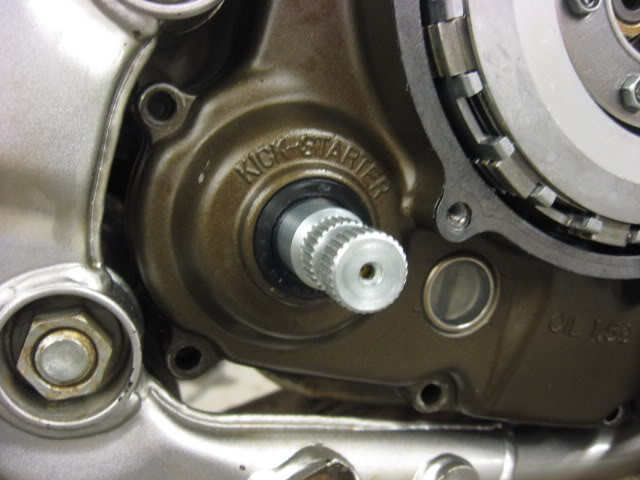
Take the cover off and finish cleaning all the mating surfaces. I'm not impressed with this gasket remover stuff.

/IDRIDR
!!!CRITICAL!!! Be sure the dimples line up on these parts as shown:
Turn the mechanism clockwise all the way. Insert the spring in the shaft, and turn the spring clockwise about 3/4 turn until it can be inserted into the engine case to lock it.
Knock out the kick start plug from the right side cover and put the cover on to check fit.
Take the cover off and finish cleaning all the mating surfaces. I'm not impressed with this gasket remover stuff.
/IDRIDR
Last edited by IDRIDR; 01-08-2012 at 05:30 PM.
#48
01-08-2012, 06:37 PM
Wow, nice write up and pics IDRIDR
Glad to see it is coming together. Even going above and beyond the call by installing the clutch, kick starter and headlight.
Don't feel bad on the simple mistakes on the big bore, I made a few as well. All part of the learning experience.
Let us know how she runs.
Glad to see it is coming together. Even going above and beyond the call by installing the clutch, kick starter and headlight.
Don't feel bad on the simple mistakes on the big bore, I made a few as well. All part of the learning experience.
Let us know how she runs.
#49
01-08-2012, 07:19 PM
Join Date: Oct 2010
Location: SW Idaho
Posts: 4,507
Wow, nice write up and pics IDRIDR
Glad to see it is coming together. Even going above and beyond the call by installing the clutch, kick starter and headlight.
Don't feel bad on the simple mistakes on the big bore, I made a few as well. All part of the learning experience.
Let us know how she runs.
Glad to see it is coming together. Even going above and beyond the call by installing the clutch, kick starter and headlight.
Don't feel bad on the simple mistakes on the big bore, I made a few as well. All part of the learning experience.
Let us know how she runs.
I don't feel bad on forgetting to get the head gasket in place, mainly because the experienced fellow helping me was the one who forgot it. If he can make that mistake...hey *%it happens. But not inspecting the gaskets carefully as soon as they arrived kind of upsets me because I know better and now I'm likely another 2 weeks out from a running bike.
#50
01-08-2012, 07:40 PM
I can't be more appreciative of this thread. I am in the search process for a decent condition bike while saving for a new one. Which ever comes first, I WILL be riding one of these this spring. This thread is a tremendous resource. Like an "Incredible Journey" through every God forsaken part of the motorcycle. What more can I ask for for seeing just how easy it is for this bike to be completely torn down. Makes the day to day stuff look like a piece of cake and a real incentive for constant care. GREAT STUFF!!!