Acebis Dimension Install
#1
 10-21-2008, 11:46 AM

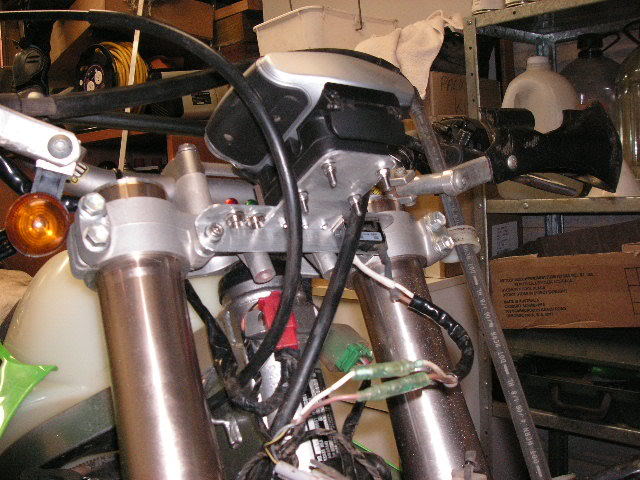
When installing the Acerbis Dimension headlight, I chose to do away with as much "excess" stuff as I could.
I mounted the indicators to the headlight housing using existing holes.
The I wired both the indicators and the headlight to a common plug to enable the headlight to be easily removed.
As I was not connecting the high beam or parking light, a 4 pin plug was enough.
Maybe a 6 pin would be better for most people.

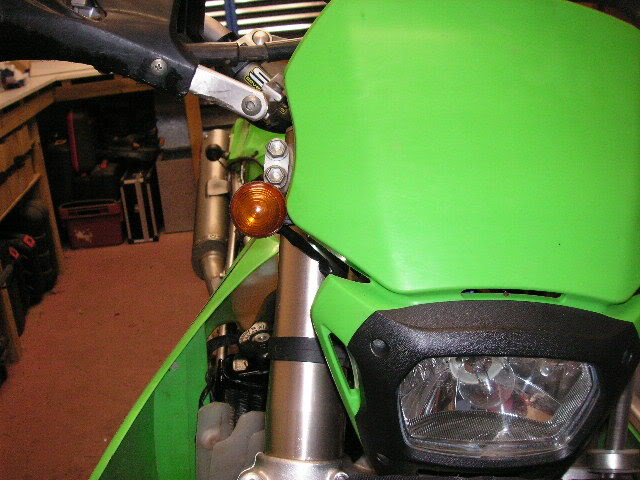


It's a very simple and light weight set up.
I mounted the indicators to the headlight housing using existing holes.
The I wired both the indicators and the headlight to a common plug to enable the headlight to be easily removed.
As I was not connecting the high beam or parking light, a 4 pin plug was enough.
Maybe a 6 pin would be better for most people.
It's a very simple and light weight set up.
#2
10-21-2008, 11:58 AM
That's some tidy work there Neil.
Would love to get mine done too but I'm saving for another bike at the moment.
I need a bike for my old man when he visits so we can do a few trips together.
I wont be selling the KLX though.
Would love to get mine done too but I'm saving for another bike at the moment.
I need a bike for my old man when he visits so we can do a few trips together.
I wont be selling the KLX though.
#3
10-21-2008, 12:59 PM

Very nice!
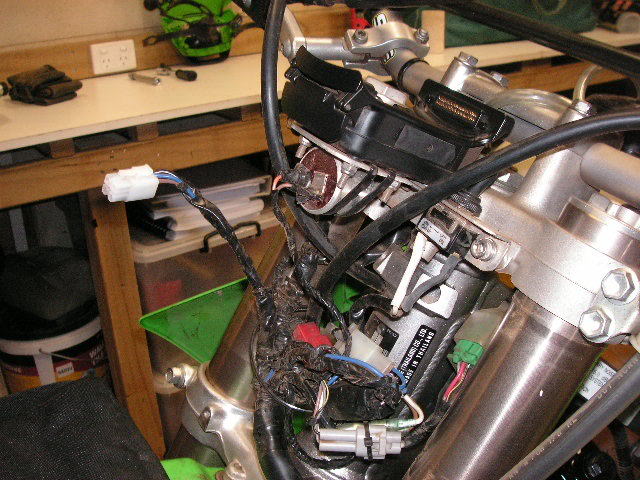
Where did you tuck away the turn signal relay? Is that the stock triple-clamp? The US version has a big bracket on the front where the ignition switch goes that I'd have to grind off. Where did you relocate the ignition switch? Or did you replace it with a toggle switch?
I like the idea of mounting the turn signals to the headlight housing itself. I think I can pull that off with the Cyclops. This solves half my problem. The other is mounting the Vapor. Then I can get rid of that heavy stock bracket.
#4
10-21-2008, 01:28 PM
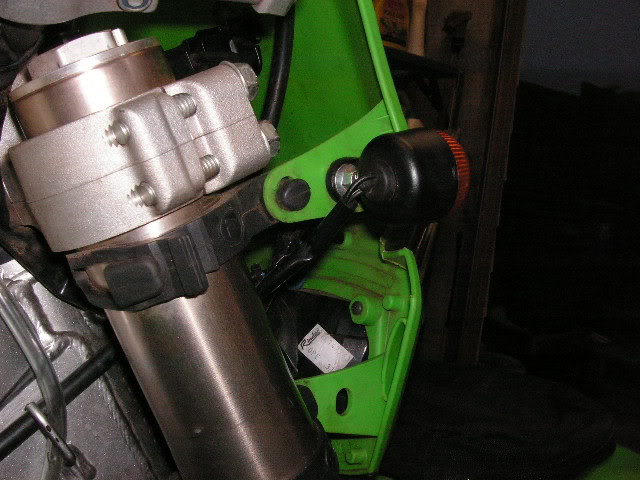
In the last pic you see the tin can strapped under the GPS mount?
That's the turn relay.
It's different to the stock one in that it's non load dependent.
I did cut away the alloy ring that was around the ignition switch and put a toggle switch in it's place.
This shows what I did.

And with the GPS mounted with the switch on it's left.

That's the turn relay.
It's different to the stock one in that it's non load dependent.
I did cut away the alloy ring that was around the ignition switch and put a toggle switch in it's place.
This shows what I did.
And with the GPS mounted with the switch on it's left.

#6
10-21-2008, 02:07 PM
Thanks,
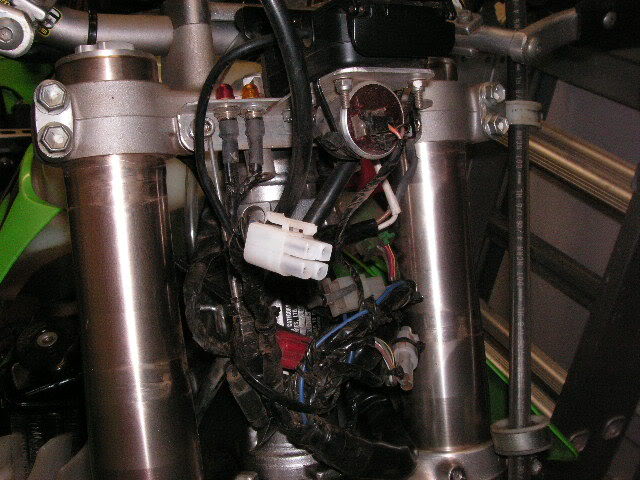
I did a write up on the whole ignition switch removal and GPS install a while back.
Here is a view of the underside of the bracket and toggle install.
I did a write up on the whole ignition switch removal and GPS install a while back.
Here is a view of the underside of the bracket and toggle install.
#7
10-21-2008, 03:20 PM

How is everyone making these excellent looking custom mounting brackets? Do you just buy stock aluminum and use standard power tools, or does it require something special to do?
I've seen a couple Vapor mounts that look awesome, too.
I've seen a couple Vapor mounts that look awesome, too.
#8
10-21-2008, 03:23 PM

#10
10-21-2008, 08:09 PM
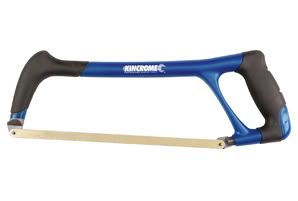 I have one of those. Not as nice, but it cuts!
Originally Posted by mc1457
Testify - I used a hack saw, drill press, files, and aluminum stock picked up at a popular home improvement store.